Why plant trees?
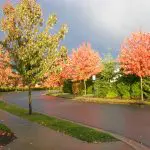
Trees provide wonderful benefits for Bellingham and contribute to our quality of life. Not only do trees add beauty, but they also provide shade, reduce levels of noise and dust, boost property values, reduce stormwater pollution and erosion, produce oxygen, absorb carbon dioxide, improve wellbeing, provide food and habitat for wildlife, reduce energy costs, and represent local culture and identity. In the past, Bellingham was dominated by forest, which has been cared for by the peoples of Lhaq’temish (Lummi) Nation and Nuxwsa’7aq (Nooksack) Tribe since time immemorial. We are fortunate to still have forest and trees that remain a part of our community.
The City recognizes the value of trees and is a proud Tree City USA community, recognized nationally for our community-based effort to sustain our urban forest.

The City plants thousands of trees each year in parks, open spaces, restoration sites, and other public property and encourages community members to plant trees too. The City’s Community Tree Programs help make it easier to plant trees on private property and in neighborhoods. Planting trees increases tree canopy cover citywide and expands tree benefits, helping Bellingham meet the goals in our Climate Action Plan and upcoming Urban Forest Plan.
Are you ready to plant a tree near you? Learn more below.
Tree Planting Guidelines and Requirements
Before picking a tree or where to plant it, consider what your yard or space may look like in 10-20 years. Planting the right tree in the right place today will maximize your tree’s chance of survival. Consider factors that may affect your tree planting site such as property lines, underground utilities, structures, overhead power and telephone lines, sidewalks, roads, and driveways. Always call 8-1-1 at least two days before digging to identify underground utilities.
Before planting – look up, down, and all around.
Which tree species you select will depend on several factors including the location where you plan to plant the tree and why you are planting the tree. Trained staff at plant nurseries or a landscaping professional can help you decide which tree species to choose based on your specific needs and site limitations.
When choosing a tree, it is important to consider these factors before deciding which species to select:
What’s in a name?
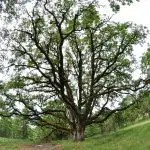
Each plant typically has a common name and scientific name. The scientific name is a formal name that is specific to a plant species. Common names can change from nursery to nursery. For example, the native Western Washington tree “Garry Oak” is commonly known by a few names, but only has one scientific name:
Common Name
Garry oak, Oregon white oak, Oregon oak, white oak
Scientific Name
Quercus garryana
Successful planting depends on the hole you dig. Structural roots anchor the tree and provide the framework for absorbing roots. Absorbing roots are tiny roots found in the uppermost part of the soil. They provide the tree with water, air, and nutrients. Provide good conditions and your tree will grow fast and strong!
Fall, winter, and early spring are the best time of year to plant trees. These times of year are less stressful for the plant and allow them to get plenty of water to support new growth. If planting in the winter, choose a time to plant when the ground is not frozen.
Where you plant will depend on your site conditions and what benefits you are looking for from your tree. Here are some guidelines to follow:
Planting tips to avoid current or future obstacles:
- Neighbors: Plant at least 5 feet from your property line; you don’t want your tree to encroach on your neighbor’s property.
- Driveways: Plant at least 5 feet away to prevent cracks in the pavement.
- Sidewalks, roads, alleyways: If you are planting near a sidewalk, road, alleyway, or undeveloped right-of-way, you may need an approved Street Tree Permit before planting.
- Structures: Plant at least 10 feet away from structures (such as your house or shed) to prevent roots and branches from causing damage.
- Solar panels: If you or your neighbor have solar panels, consider the mature tree height and south/west sun orientation to avoid shading the panels.
- Overhead utilities: Do not plant a tree within 15 feet of overhead power or telephone lines. Trees that mature at over 25 feet tall may interfere with utility lines if planted within 15 feet and could be removed by a utility company.
- Other plants: Consider the mature size of nearby plants and your new tree to ensure the space will be suitable long-term.
Prep your site by removing any weeds in the area to ensure that the young plants are competing for nutrients, water, and sunlight.
Before planting, your tree will likely be in one of these forms:
- Balled and in burlap – Remove all ties from around the trunk and all wires, twine, and wire baskets from the root ball. Gently pull the burlap away from the ball, ease the roots through the burlap, and then remove the burlap completely.
- Container – Remove the container before planting. This includes peat pots. Keep the soil around the tree’s roots moist until you are ready to plant!
- Bare root – Make the hole wide enough to completely spread the roots out in all directions. This helps optimize root growth.
- Plug – Tree plugs are seedlings that were started and grown in individual cells filled with potting soil. Always handle the tree plugs carefully. Hold them gently by their root balls, don’t lift them by their stems. Minimize the time the plug’s roots are exposed to air so that they don’t dry out. Remove them from the packaging once your site is prepared.
What you’ll need: Gloves, shovel, tree, water, mulch
- Dig the hole: Remove grass sod and dig a saucer-shaped hole that is two to three times as wide and as deep as the root ball. Pile the soil into one area so it is easy to reuse. Use your hands to roughen and loosen the soil around the sides of the hole to make it easier for the roots to penetrate the soil.
- Prepare the roots: Gently massage the root ball until the roots are loosened. Remove any soil from above the root flare. The root flare is where the roots spread out from the trunk of the tree. Root tips die when exposed to excess light and air. Work quickly!
- Place the tree in the hole: Make a mound of soil in the middle of the hole to set the root flare even with the original grade around the tree. Spread the roots out in all directions.
- Fill the hole with soil: Use your hands to gently pat the soil around the roots to collapse air pockets as you backfill the hole with soil.
- Water thoroughly: Water needs will depend on the tree species and time of year. Water enough to dampen the soil without making it soggy. Only water the base of the tree – avoid getting the leaves (foliage) wet.
- Mulch around the tree: Form a mulch ring, or “donut” around the tree. Keep the mulch about one inch away from the trunk. Mulch helps by limiting weeds, keeping the soil moist, and making sure grass trimmers stay away from the trunk. Mulching materials include compost, bark, wood chips, etc. The mulch ring should be three to four inches deep and form a three-foot radius circle from the trunk to the tree.
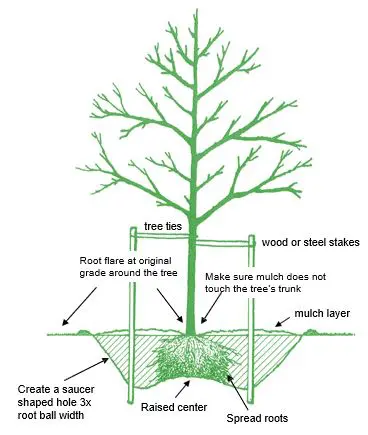
Staking: Stake your tree only if necessary. This is only recommended for trees that are balled and in burlap or for large tree. Do not use wire or anything that could cut into the bark. Ready-made tree ties work well. Remove the stake after one year.
Planting the right tree in the right place will help your tree’s chance of survival, but each tree will need routine maintenance to help it grow to maturity. Each tree species has specific needs, but typically these guidelines will contribute to the survival of any young tree:
- Water deeply during late spring through the summer when the weather is warmer and dry. Only water the base of the tree to avoid getting the leaves (foliage) wet. Check soil daily for watering needs. Water enough so that the soil is evenly moist, but not soggy. Young plants need water more often to make sure they don’t dry out.
- Remove weeds and grass from mulched area. This ensures the young plants aren’t competing for nutrients, water, and sunlight. Learn how to manage weeds naturally.
- Monitor for insects and disease problems.
- Avoid fertilizing your tree during the first year to allow your tree to focus on growing roots. Fertilizers push the trees energy into the upward/leafy growth and may result in a longer time for your tree to establish.
- Prune for appropriate reasons (see below).
Proper pruning is essential in developing a tree with a strong structure and desirable form. If a young tree is pruned correctly, it will require little corrective pruning when mature.
Pruning principles to keep in mind:
- Each cut has the potential to change the growth of the tree. Always have a purpose in mind before making a cut.
- Proper technique is essential. Poor pruning can damage a tree for life.
- Trees do not heal the way people do. When a tree is wounded, it must grow over and compartmentalize the wound. The wound is contained within the tree for the rest of the tree’s life.
- Small cuts do less damage than large cuts.

What to prune:
- Remove dead wood: During the first year, only remove damaged or dead limbs. The tree will need all its leaf surface to grow new roots.
- Prune for good structure: After the first year, prune young trees to establish a strong structure for future growth. Remove rubbing branches and any branches growing downward. Encourage a strong central leader and good spacing of branches. As the tree grows big enough, remove lower branches for pedestrian and vehicle passage.
- Do not cut the leader: Doing this will stress a tree and will make it more vulnerable to insect and disease infestations. Decay will move down the stems from these cuts, shortening the tree’s life.
- Remove suckers, or sprouts at the base of a tree, to direct growth and energy to the rest of the tree.
Trees in City parks
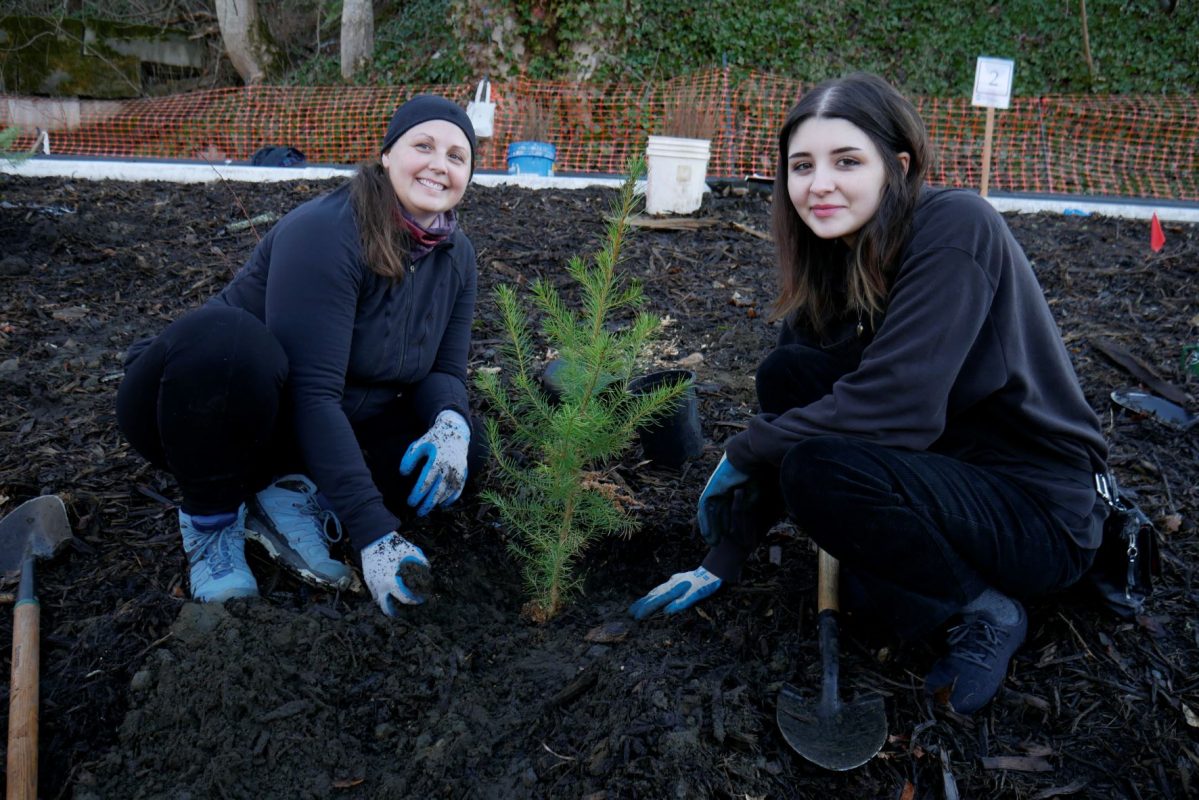
Want to plant trees in parks or open spaces? The Parks Volunteer Program offers individuals and groups the opportunity to participate in community work parties and individual stewardship to plant and care for trees and native vegetation.
Questions or concerns about trees in City parks or open spaces can be directed to Park Operations at (360) 778-7100.

Contact
For more information, please contact habitat@cob.org.
